The Joy of Homemade Air Fryer Bread
There’s an undeniable magic that comes from the smell of freshly baked bread wafting through your home. One of my favorite discoveries in the kitchen has been making Air Fryer Homemade Bread. It’s quick, easy, and the results are astonishingly delicious. Whether you’re looking to up your brunch game or simply craving a comforting loaf of warm bread to accompany dinner, this recipe will have you hooked. With just a few simple ingredients and a little bit of patience, you can create the perfect loaves in the convenience of your air fryer!
Why You’ll Love This Dish
Making homemade bread may seem like a daunting task, but this air fryer recipe simplifies the process and makes it accessible to everyone. It’s not only cost-effective—far more budget-friendly than store-bought artisan loaves—but it also tastes infinitely better. Your family and friends will be impressed, and the best part? It’s perfect for any occasion, be it a cozy weeknight dinner, a holiday gathering, or a delightful Sunday brunch.
"This bread turned out more amazing than I expected! The crust was perfectly golden, and the inside was soft and fluffy. I’ve never had such a great homemade bread experience!" – A happy home baker
The Cooking Process Explained
Ready to dive in? Here’s how this delicious bread comes together. You’ll start with warm water, yeast, and a touch of sugar to activate the yeast. Next, you’ll mix in the flour and salt, knead the dough to perfection, and let it rise. After shaping your loaves, they’ll get another rise before you pop them into the air fryer. Overall, this process takes just a couple of hours, but much of that time is hands-off, letting the yeast do its magic.
What You’ll Need
For this easy recipe, gather the following ingredients:
- 1 1⁄2 cups warm water
- 2 1⁄4 teaspoons active dry yeast
- 1 tablespoon granulated sugar
- 1 teaspoon salt
- 3 1⁄2 – 4 cups all-purpose flour (you may need a little more, depending on your dough consistency)
- 1 tablespoon olive oil
- Two small loaf pans
Feel free to make adjustments! For a whole wheat twist, substitute some of the all-purpose flour, or try adding an herb infused oil for a flavor boost.
Step-by-Step Instructions
- In a large bowl, mix the warm water, sugar, and yeast. Let it sit for 5-10 minutes until it becomes frothy.
- Stir in the salt and 3 cups of flour. With a spoon, combine the ingredients until they form a rough dough. Gradually add more flour, a half cup at a time, until the dough is slightly sticky but cohesive.
- Turn the dough out onto a floured surface and knead for 5-7 minutes, until it’s smooth and elastic.
- Lightly oil the bowl and place the dough inside, turning it to coat. Cover with plastic wrap or a damp towel, and let it rise in a warm area for 1-1.5 hours, or until it doubles in size.
- Punch down the dough, divide it in half, and shape each piece into a loaf. Place them in the greased loaf pans.
- Cover the pans loosely with a towel and let them rise again for 30-45 minutes, until nearly doubled.
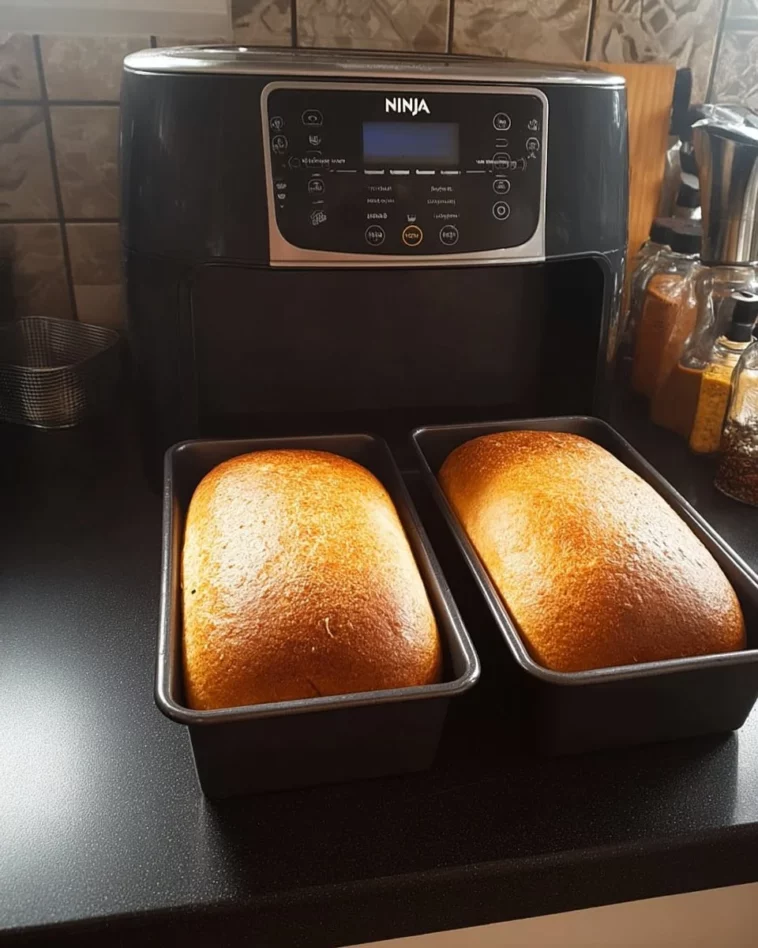
- Carefully place one loaf pan in your air fryer basket.
- Air fry at 300°F (150°C) for 20-25 minutes, or until the loaves are golden brown and sound hollow when tapped.
- Remove the loaves immediately from the pans and let them cool on a wire rack before slicing.
Best Ways to Enjoy It
Now comes the fun part: serving your freshly baked bread! Slice it up and serve it alongside a hearty soup, creamy butter, or a zesty olive oil for dipping. Consider pairing it with a fresh salad for a light lunch or use it for gourmet sandwiches. Toasted with a smear of homemade jam or fresh avocado is also a delicious choice!
Keeping Leftovers Fresh
To store your homemade bread, wrap it tightly in plastic wrap and keep it at room temperature. It’s best enjoyed fresh but should stay tasty for about 2-3 days. For longer storage, slice and freeze the loaves, placing parchment paper between slices to allow for easy separation when you want to toast or serve them.
Helpful Cooking Tips
- Water Temperature: Make sure your warm water isn’t too hot, as this can kill the yeast. Aim for a temperature of about 110°F (43°C).
- Kneading Technique: Don’t skip the kneading! It develops gluten, giving your bread that desirable chewy texture.
- Rising Time: If your kitchen is cool, putting the dough in a slightly warmed oven can create a perfect environment for rising.
Creative Twists
Feel free to customize your bread! Consider adding:
- Herbs mixed into the dough like rosemary or thyme for a savory loaf.
- Cheese, such as shredded cheddar, for a richer flavor.
- Dried fruits or nuts for a sweet variation.
Common Questions
How long does it take to prepare this bread?
The total time, including rising, is about 2-2.5 hours, but only a fraction of that is active cooking time.
Can I use instant yeast instead of active dry yeast?
Absolutely! If using instant yeast, you can skip the frothing step with warm water; just mix it directly with the dry ingredients.
What’s the best way to reheat the bread?
To reheat, wrap slices in aluminum foil and place them in a preheated oven at 350°F (175°C) for about 10-15 minutes for perfect warmth without drying out.
With this Air Fryer Homemade Bread recipe, you’re well on your way to providing your family with fresh, delightful loaves anytime you want. Enjoy the baking process, and happy eating!