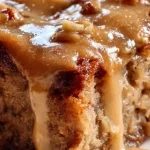
Chicago-Style Bakery Apple Slices are a delightful treat that brings together tart and sweet flavors nestled between flaky crusts. This recipe, reminiscent of the bakery offerings in the Windy City, is perfect for family gatherings, cozy weekends, or whenever the craving for a comforting dessert strikes. Having perfected this dish over time, I can confidently say that it offers warmth, nostalgia, and a bite of deliciousness that’s simply irresistible.
Why You’ll Love This Dish
What’s not to adore about a classic apple dessert? Chicago-Style Bakery Apple Slices are budget-friendly and accessible, making them ideal for novice bakers and seasoned pros alike. They’re not only a hit at family brunches but also shine during holidays or festive events. Whether you’re celebrating a special occasion or just want to enjoy a homemade dessert, these apple slices fit the bill beautifully.
“I made these for my family reunion, and they disappeared in minutes! The flaky crust and the spiced apple filling were just perfect.” – A satisfied home baker
Preparing Chicago-Style Bakery Apple Slices
This recipe breaks down into simple steps, so you can easily follow along. You’ll appreciate how straightforward it is to make this stunning dessert that features a sumptuous apple filling. From crafting the perfect flaky crust to adding a sweet glaze on top, each phase leads to a delicious result that will impress anyone.
What You’ll Need
Here’s the full list of ingredients for making Chicago-Style Bakery Apple Slices:
- 3 cups all-purpose flour
- 1 tablespoon granulated sugar
- 1 teaspoon salt
- 1 cup unsalted butter, cold and cubed
- 2 large eggs
- 5-6 tablespoons cold water
- 8 cups apples, peeled, cored, and thinly sliced
- 3/4 cup granulated sugar
- 1/4 cup light brown sugar, packed
- 2 tablespoons all-purpose flour
- 1 teaspoon ground cinnamon
- 1/4 teaspoon ground nutmeg
- 1 tablespoon lemon juice
- 1 tablespoon unsalted butter, melted
- 1 cup powdered sugar
- 2-3 tablespoons milk
- 1/2 teaspoon vanilla extract
Feel free to substitute ingredients if needed! For instance, using a gluten-free flour blend works well for those with dietary restrictions.
Directions to Follow
-
Prepare the Crust: In a large mixing bowl, combine flour, granulated sugar, and salt. Add in the cold, cubed butter and cut it into the mixture until it looks like coarse crumbs. In a separate bowl, beat the eggs and mix in 5 tablespoons of cold water. Gradually add this to the flour mixture until the dough forms. If it’s too dry, add an additional tablespoon of water, one teaspoon at a time. Wrap the dough into two portions and refrigerate for at least 30 minutes.
-
Preheat Oven & Prep Pan: Heat your oven to 375°F (190°C). Grease a 9×13-inch baking pan.
-
Prepare the Apple Filling: In a large bowl, toss the sliced apples with granulated sugar, brown sugar, flour, cinnamon, nutmeg, and lemon juice until well coated.
-
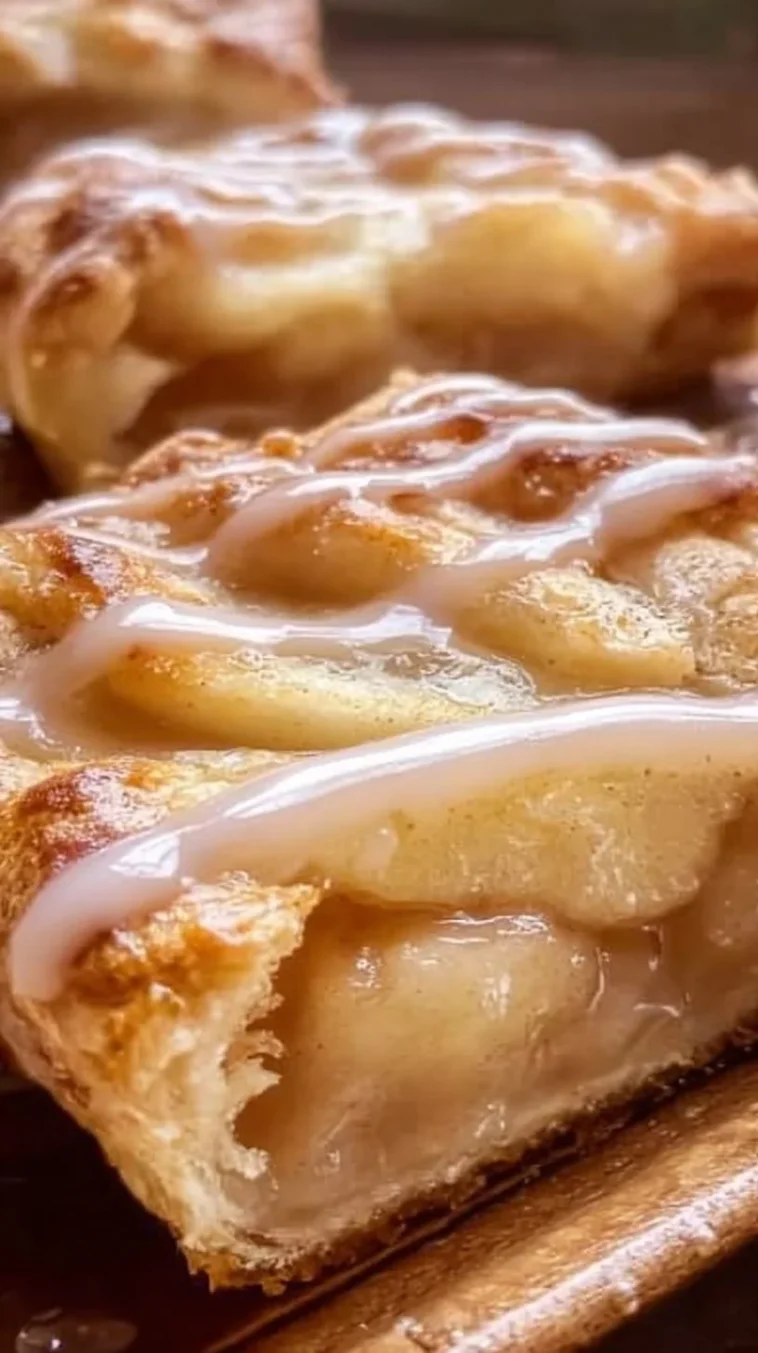
Assemble the Slices: Roll out one portion of dough into a rectangle, place it in the pan, and press it into the base. Pour the apple filling evenly on top and drizzle melted butter over the apples. Roll out the second portion of dough and lay it over the filling. Seal the edges and cut slits in the top crust.
-
Bake the Apple Slices: Bake for 40-45 minutes until the crust is golden brown and the apples are tender. If the edges are browning too quickly, use aluminum foil to cover them.
-
Make the Glaze: As the slices cool, whisk together powdered sugar, milk, and vanilla in a bowl. Adjust the milk as needed to achieve your preferred consistency.
-
Glaze & Serve: Drizzle the glaze over the cooled apple slices and let it set for about 10 minutes before cutting into squares and serving.
Best Ways to Enjoy It
These delicious apple slices are delightful on their own, but you can take them to the next level. Serve them warm with a scoop of vanilla ice cream, a dollop of whipped cream, or a sprinkle of cinnamon for an extra touch. They also pair beautifully with a cup of hot coffee or tea, making them a perfect dessert for a cozy gathering.
How to Store & Freeze
To keep your apple slices fresh, store them in an airtight container at room temperature for up to two days. If you want to prolong their life, consider refrigerating them, where they can last up to a week. For longer storage, slice and freeze the leftovers by wrapping individual pieces in plastic wrap, then in aluminum foil. They can last for up to three months in the freezer. Always ensure they’re completely cooled before storing.
Helpful Cooking Tips
- Chill Your Dough: For a flakier crust, ensure your butter and water are ice-cold when mixing the dough.
- Apple Variety Matters: Use a mix of apples like Granny Smith and Honeycrisp for the best flavor balance—tart and sweet!
- Don’t Skip the Glaze: It adds a delightful sweetness and makes your apple slices look bakery-fresh!
Creative Twists
Feeling adventurous? You can customize this recipe with different flavors! Consider adding raisins or cranberries to the apple mixture for a new twist. You can also replace half of the sugar with maple syrup for a more earthy sweetness or add nuts for crunch. Additionally, try out spices like ginger or cardamom for an unexpected flavor kick.
Common Questions
How long does it take to prepare the apple slices?
Preparation takes about 30 minutes, followed by around 45 minutes of baking time.
Can I substitute the butter with margarine?
Yes, margarine or a vegan butter substitute can work in this recipe. However, flavor and texture might vary slightly.
What’s the best way to tell when the apple slices are done baking?
The crust should be golden brown, and the apples should be tender. You can also check by inserting a knife into the filling; it should go through easily.
By following this guide, you’ll create delightful Chicago-Style Bakery Apple Slices that are sure to be a hit at your next gathering! Enjoy baking and the delicious slice of nostalgia.